Plant propagation made easy

As much as I love shopping for plants in the nursery, I also love to “make” my own plants. Many common garden plants are not difficult to propagate, but it does take some basic knowledge and lots of patience.
If you’ve never propagated plants before, geraniums, creeping plants in the mint family, succulents, even roses are some of the best plants to start with. Each is propagated using a different technique. The techniques described below are the basics. Once you master them, you can use them with other plants, too.
One note of caution: It is illegal to propagate a patented plant, so check the label or look up the variety first. If it isn’t patented, give it a try.
More geraniums from stem cuttings
Start with some healthy branches of flowering geranium. The best branches have not yet developed flowers or flower buds. Cut the branch off the main plant, and then cut the branch into 4- to 6-inch-long sections, making sure to include at least three sets of leaves along the stem of each piece. Each piece is called a “cutting.”
Remove the lower two sets of leaves on each cutting; make sure the top set of leaves remains attached.
Fill a 1-gallon pot with damp potting soil. Use your finger or a chopstick to poke a hole in the potting soil for each cutting. Insert a stem into each hole, deep enough for the nodes (a node is a “joint” along the stem where you removed the leaves) to be below the surface of the potting soil while the leaves are above. I cram a bunch of stems into a single pot — eight or 10 fit easily unless the stems are really thick.
Firm the soil in the pot, then water to settle the soil around the stems. Place the pot in a brightly lit spot out of direct sunlight. Keep the potting soil damp. Wait several weeks for roots to sprout at the nodes. To test for rooting, gently tug on a stem. The better it is rooted, the more it will resist. Be patient; there’s no rush.
After stems are rooted, set the pot on its side and gently turn out the contents. Separate the cuttings with their roots attached, then repot each one into its own container. Allow plants a couple of months to root in their containers before planting them in the garden.
This method also works for salvias and many other non-woody perennial plants.
More mint, oregano and their relatives from roots
Mint, oregano, marjoram and other herbs in the mint family spread by roots to form big patches. So, while you can propagate them using the geranium cutting method, it’s much easier to simply dig up a few trowels-full of the plant with roots attached. Plant the roots elsewhere in your garden, into a pot, or share with a friend. To plant, simply bury the roots, water right away, and water every so often after that. Once the roots are established and the plant starts to spread, you can harvest the leaves.
A note about growing mint: Grow it ONLY in a pot that sits on a hard surface or that has an air gap between the pot and soil. Mint spreads so aggressively that you’ll regret planting it in the ground (I speak from personal experience).
More roses from cuttings
Many roses are easily propagated from cuttings. Start with the geranium propagation method and make several cuttings from the ends of not-yet-budded or flowering stems. Newer growth is ideal. The ideal cuttings are 4 to 6 inches long and include several sets of leaves. Remove the lower leaves; allow a few leaves to remain attached at the top. Treat the bottom ends of the cuttings with rooting hormone (powder, gel or liquid) or soak in willow water for at least 20 minutes (see instructions for willow water below).
Fill a zip-top sandwich bag two-thirds-full with damp potting soil. Insert up to three rose stem cuttings into each sandwich bag. Zip the bag to almost closed around the stems. Don’t try to seal the bag all the way, since the cuttings stick out of the bag. Use a clothespin or binder clip to hang each bag on a clothesline in bright light but away from direct sunlight.
After a few weeks, you’ll notice roots in the potting soil. Once a bag is partly filled with roots, open it or cut it away. Gently pull out the cuttings with their roots attached. Gently separate the cuttings, taking care not to damage their roots. Plant each into a gallon pot of damp potting mix. Once each cutting reaches planting size, move it to a permanent spot in the garden.
More succulents from leaves
Some kinds of succulents, including many kinds of Echeveria, Sedum and Graptopetalum, readily drop their leaves when the “mama” plant is disturbed or destroyed. Those leaves sprout roots to plant themselves where they land — an adaptation that ensures a new generation of plants.
That’s why you often end up with fallen leaves when you move these plants in your garden. Don’t toss them, though. Instead, take advantage of their survival strategy to make more succulents for your own garden or to share with friends.
Starting with a handful of leaves, use only those that are whole and unblemished. Compost the damaged leaves. Spread the good leaves evenly across a paper plate, making sure they don’t touch each other. If you have many leaves, use several paper plates. Place the plate(s) in an east-facing window and wait. Don’t water. Don’t mist. Just wait. After a week or two, threadlike roots sprout at the base of each leaf where it had been attached to the mother plant. In another few weeks, a tiny plant will develop there, too.
As the little plant grows, it uses up the mama leaf’s resources. Mama leaf shrivels, then dries. That tells you it’s time to plant. Fill a pot or flat with cactus and succulent mix. Dampen the mix, then set the little plants on its surface. There’s no need to plant them, or water them, just set them on the surface with their roots touching the potting mix. The roots will grow down into the potting mix. Let the plants grow until their leaves are full size and the plants are 4 or 5 inches tall, then dig each one out and plant it in a permanent spot.
Willow water boosts stem rooting
Willow trees and shrubs contain high levels of plant hormones that stimulate rooting. So, you can soak stem cuttings in willow water before you pot them up. I have a curly willow in a large pot on my patio. It’s beautiful and I often harvest branches to make willow water to use for making cuttings. Willow water works with stem cuttings.
Making willow water is pretty much like brewing tea.
• Cut a handful of 8- to 10-inch-long willow stems and remove the leaves.
• Cut the stems into pieces about 2 inches long. Crush the cut ends with a hammer or rock. Place the cuttings in a sturdy plastic bucket or metal container.
• Boil water and pour it over the willow pieces. Let them steep overnight.
• Pour the willow water through a strainer and collect the clear liquid.
• Store willow water in a sealed, airtight container in the refrigerator, where it will stay good for a couple of months. Remember to label it and include the date it was brewed.
To use, soak the bottom edge of the cuttings in willow water for about 20 minutes (more won’t hurt), then follow the directions above to pot up the cuttings.
Don’t bother rooting cuttings in water. Water-rooted cuttings seldom survive the transition to soil, so skip the water and root directly in potting soil.
Do invest in high-quality potting mix with lots of perlite in it. There really are different qualities of potting mix, and quality really does make a difference.
Sterman is a water-wise garden designer and writer and the host of “A Growing Passion” on KPBS television. More information is at AGrowingPassion.com and www.plantsoup.com.
Get U-T Arts & Culture on Thursdays
A San Diego insider’s look at what talented artists are bringing to the stage, screen, galleries and more.
You may occasionally receive promotional content from the San Diego Union-Tribune.
More in this section

As she navigates her own path with ADHD, woman dives in to help hoarders with their messes
Whether it’s charcoal, propane, pellet or electric, here’s how to find one that fits your budget, space and cooking style

Entertaining experts agree: You don’t need a table — and certainly not a dining room — to host a memorable evening. Here’s what they recommend.

Laundry experts weigh in on what items need special treatment, and the best ways to provide it
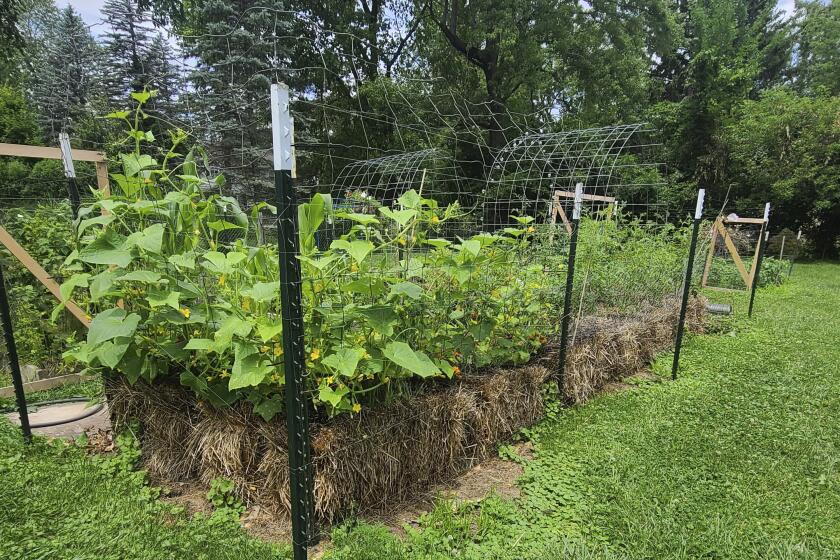
Economical alternative to raised beds provides low-maintenance way to produce vegetables

La Mesa resident’s love of whimsy and color shapes low-water landscape into an award-winning, old-fashioned charmer in Helix Water District


