
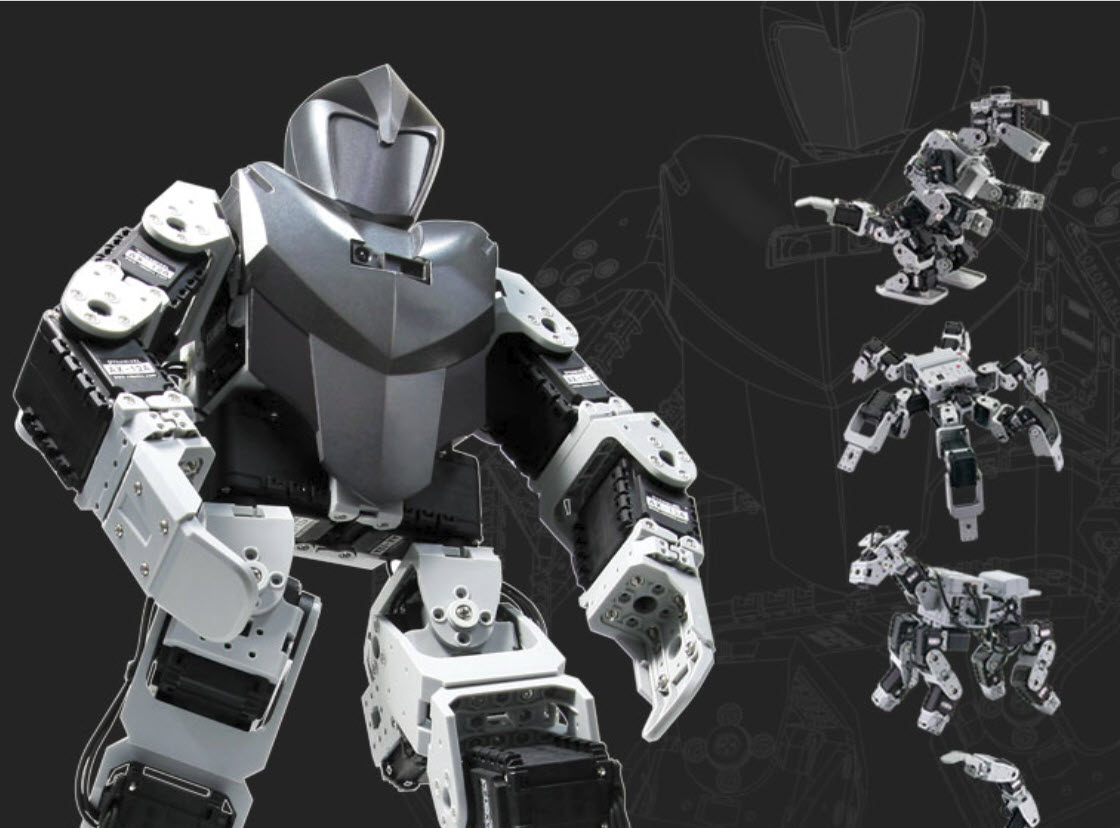
The Robotis Bioloid Premium (RBP) platform is quite interesting…though my goal was to build a humanoid robot, the kit includes the parts and pieces to build over 20 different robots, from simple articulating arms all the way up to 3 types of humanoids…though pricey at around $1,200, the value to a hobbyist roboticist becomes clear as you learn of its design and capabilities…
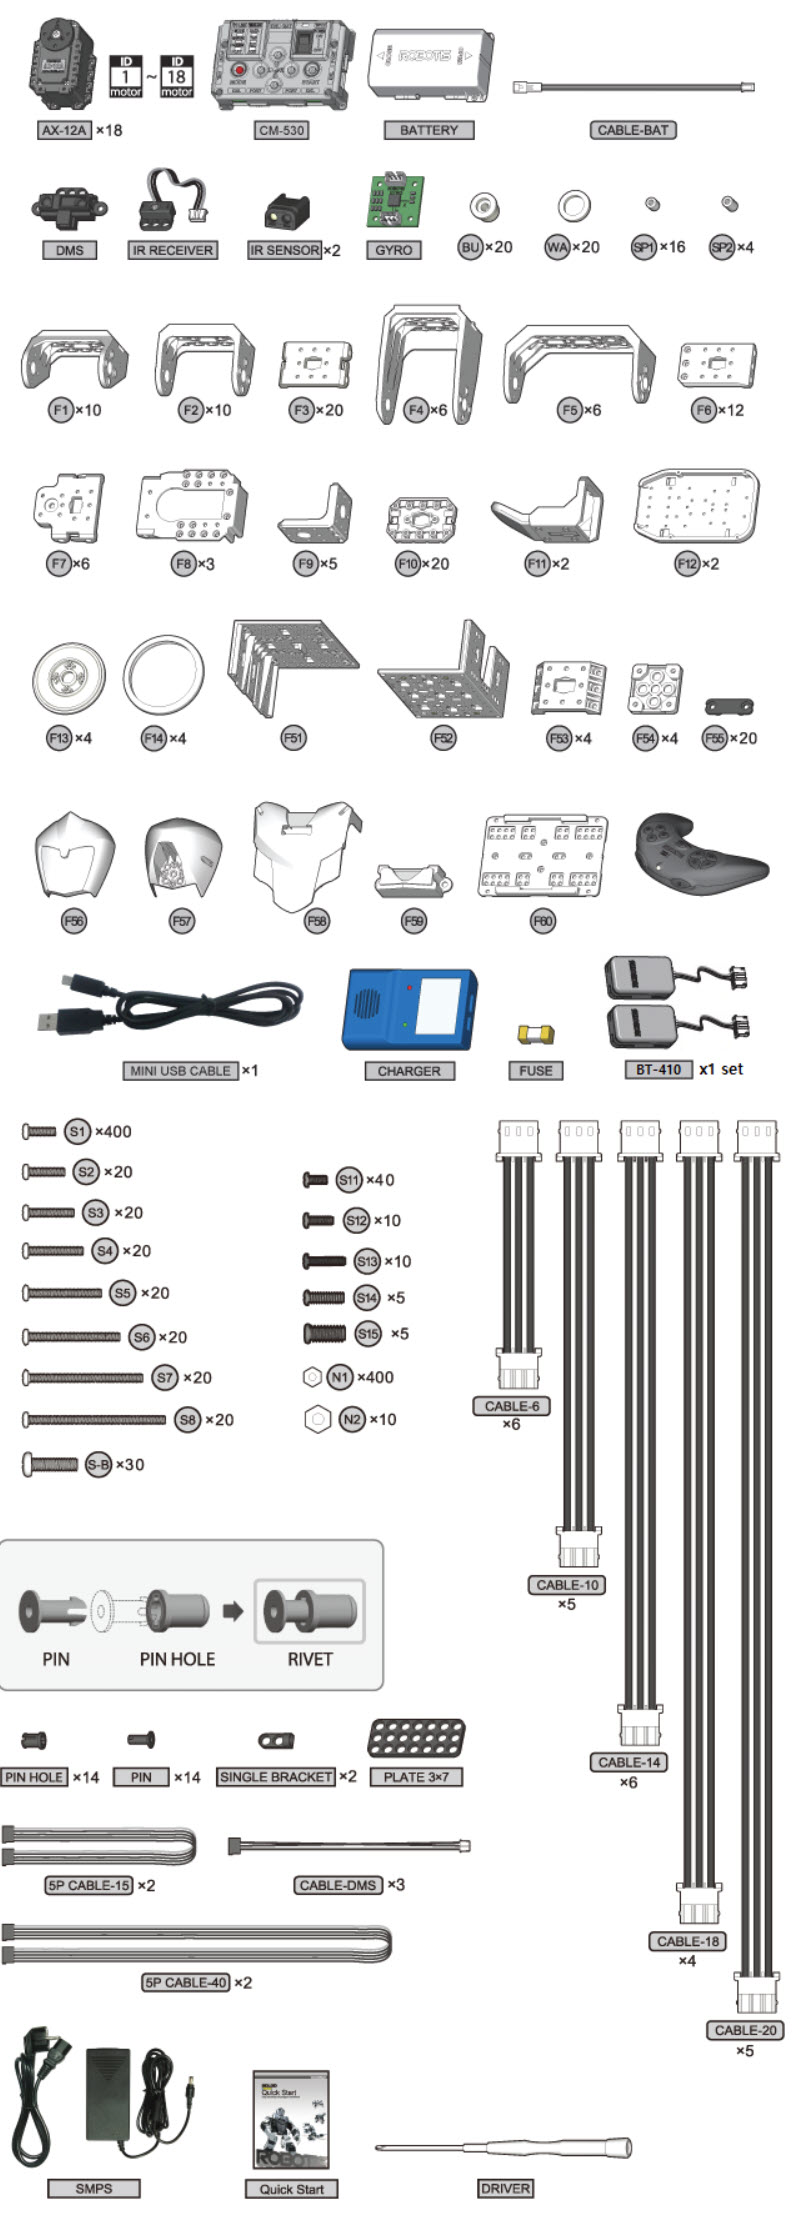
The kit comes complete with 18 intelligent servos – each servo runs on a digital bus and communicates its state back to the controller, so, e.g., once you build a robot, the controller can run routines to make sure that each servo is working and in the programmed position – this is particularly gratifying after your assembly, before you apply power, to know that if something is wrong the controller will identify it and prevent the servos from doing damage.

The Assembly. Though I was tempted to start slow and build a few of the lesser complex bots, I was anxious to get going on my humanoid and decided to just take my time, be very careful, check things twice and go ahead and build the type-A humanoid and keep my fingers crossed…once I began, I gained confidence since the instructions were precise and detailed enough to assure a rewarding end…
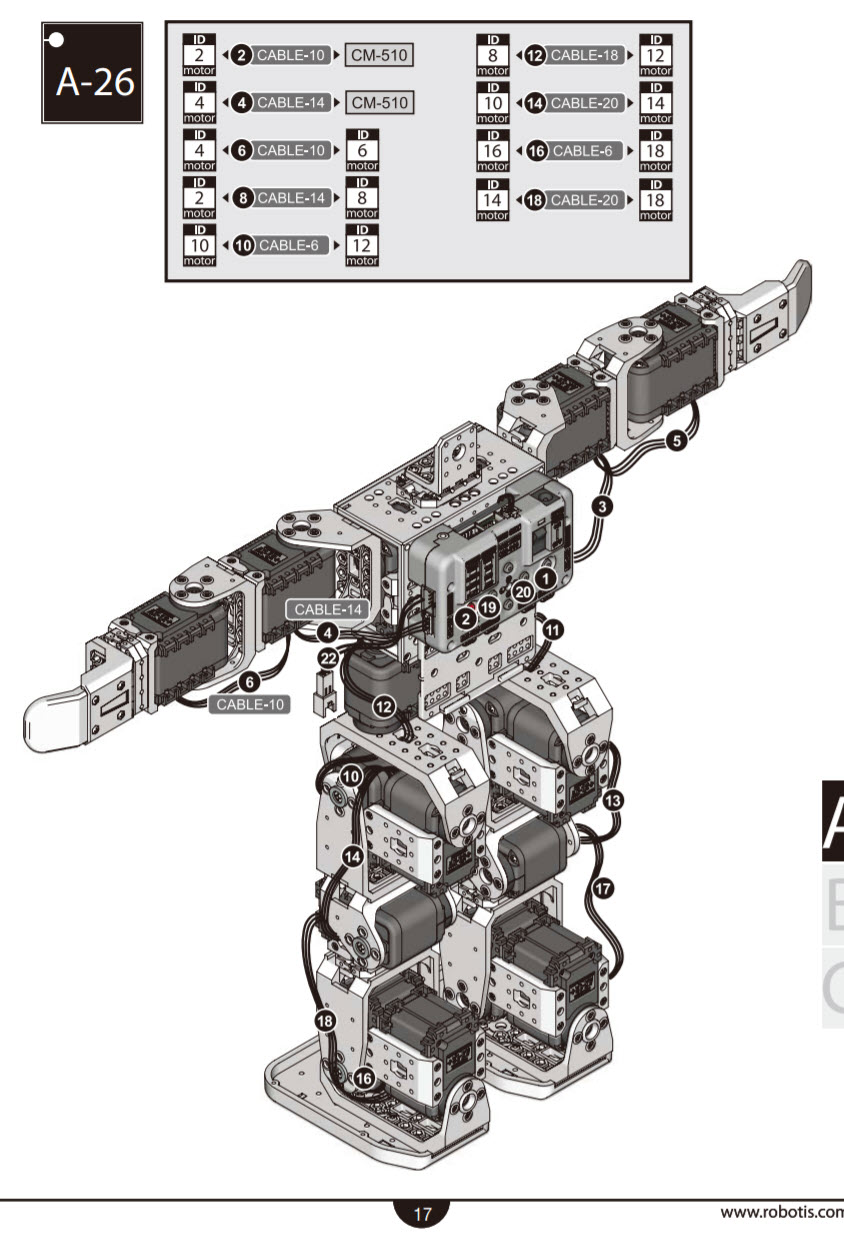
As I said, the instructions were clear, though it would have been nice at times to have a 3D image instead of the page because it can be difficult to see things such as the cabling routes and orientation of the plastic parts…going back and forth among the illustrations usually resolve any confusion I had…you want to only do things once since all the screws/nuts should receive thread-lock (Caution: Due to a change in the type of plastic used in the Bioloid Premium Kit, the use of liquid type or Loctite 242 is HIGHLY discouraged as it may damage the plastic. Stick type Loctite 248 and 268 has been tested and found acceptable.) to assure the assembly stays in place once things get animated…the vendor I chose, Trossen Robotics, included a few tubes of a proper thread-lock product with my kit…the kits seem to be fair-traded so pricing was universal, but I picked Trossen since they seemed to be the most dedicated (resource attention), and, I was able to avoid state sales tax 🙂 …
It took me about two days to complete the assembly – probably longer than most, but I wanted to be sure I was careful…my patience paid off – the first time I powered him up, all was well…
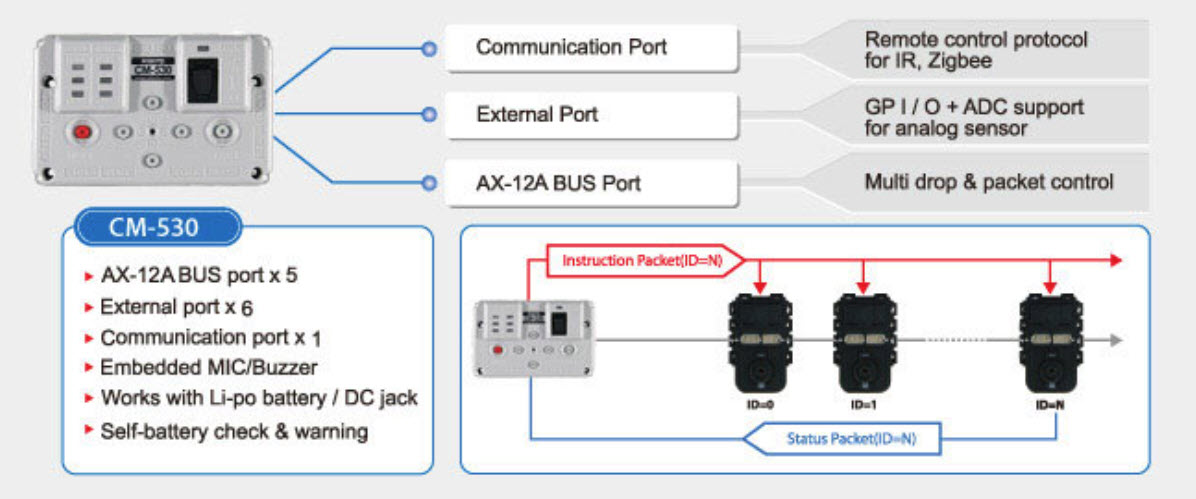
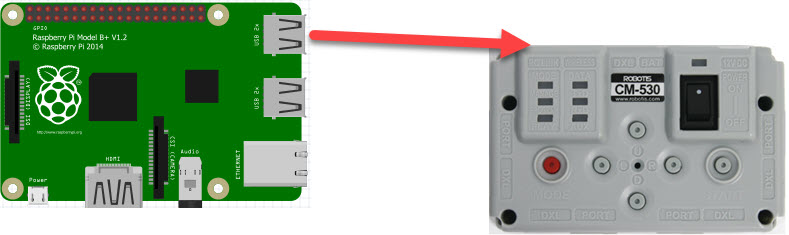
Robot Control. The controller for the RBP is the CM-530…I am guessing that it is very similar to the Arduinos and is quite programmable, though there is another Robotis controller that is compatible with the RBP that is even more capable, the OpenCM9.04…I believe there are even libraries available for the Arduino that allow direct control of the Robotis servo line with an Arduino…
I have not yet had time to explore all those possibilities of robot control because I got focused on trying to prototype voice-control…

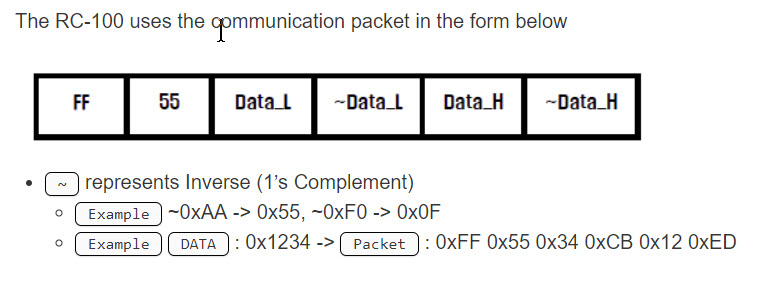
The RBP comes with a button-ladened remote controller, the RC-100B, that can issue action commands via an Infra-red or Bluetooth (BT) link…it is this aspect of controlling the RBP that first drew my attention…Robotis publishes the data packet protocol (left) used to communicate between the RC-100B and the CM-530 – the connection to the CM-530 is via its Communication Port and an IR or BLE (BT 4G) module – I had worked with BT enough during my tank projects to know that essentially a serial BT connection can create a transparent “pipe” for data, so, since I knew what the CM-530 was looking for (a data packet) to command the pre-programmed task/motion files in the RBP, I figured I could somehow issue like data packets via a serial port on the RPi directly into the CM-530 Communication Port and move the robot! Fingers crossed…
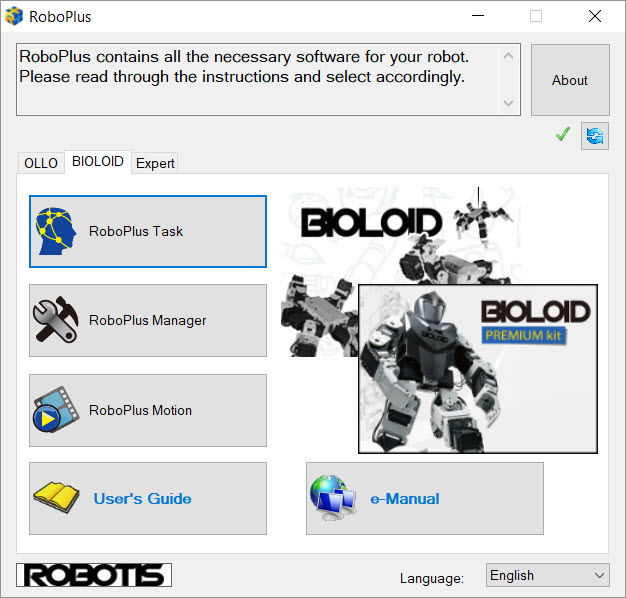
As it turned out, there was an even more simple solution…the included software used with the RBP is called RoboPlus, and contains applications to create/program Motions (animated positions) and Tasks (sequences of motions) for the robot…one of the utilities included with the Task program is a serial monitor called the Program Output Monitor – when in that screen, you can go into another mode called the Virtual RC-100…
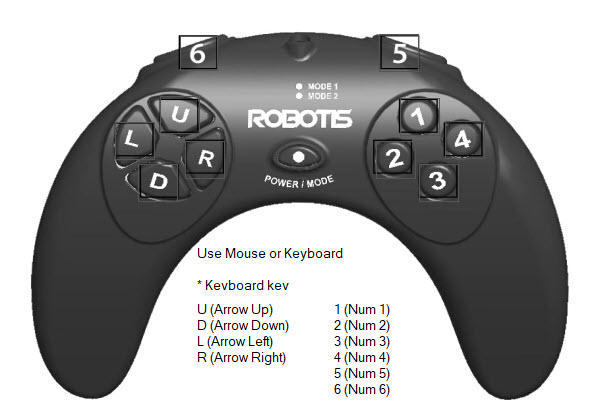
Virtual RC-100 allows you to click on an image of an RC-100B, which in turn sends a corresponding data packet, via the USB cable connected to the robot’s CM-530 Programming Port, causing the robot to react and produce a pre-programmed routine (such as move-forward or do-a-handstand) – hmmm, maybe I could just send a serial packet out of the RPi directly into the CM-530’s Programming Port – if so, when I created my snips Application, I could include such a packet in my action-result code which could then do a serial write to the CM-530!
As a test, I hurriedly composed a quick Python script in my RPi, connected one of the RPi USB ports to the CM-530’s USB port, and ran the script – the robot reacted perfectly!! Yikes! I was on my way…
